This section has 3 sub-objectives
· Configure vRealize Orchestrator plug-in for vRA
· Associate a vRO workflow with a specific lifecycle state change for a machine blueprint
· Associate a vRO endpoint with a machine blueprint
Before you start, you need to have your vRA and vCO configured and ready

· Configure vRealize Orchestrator plug-in for vRA
· Associate a vRO workflow with a specific lifecycle state change for a machine blueprint
· Associate a vRO endpoint with a machine blueprint
Before you start, you need to have your vRA and vCO configured and ready
Configure vRealize Orchestrator plug-in for vRA
All the configurations are done with the out of box workflows of vRA which are available after installing the vCO plugin for vRA.
There are 2 Workflows needed to run, one for vCAC(vRA) host and the second IaaS host of a vCAC host.
1. Add a vCAC host
a. Login to your vRO and run the workflow at Library>vCloud Automation Center > Add a vCAC Host
b. Enter the vRA details

c. Enter the details of Tenant and credentials
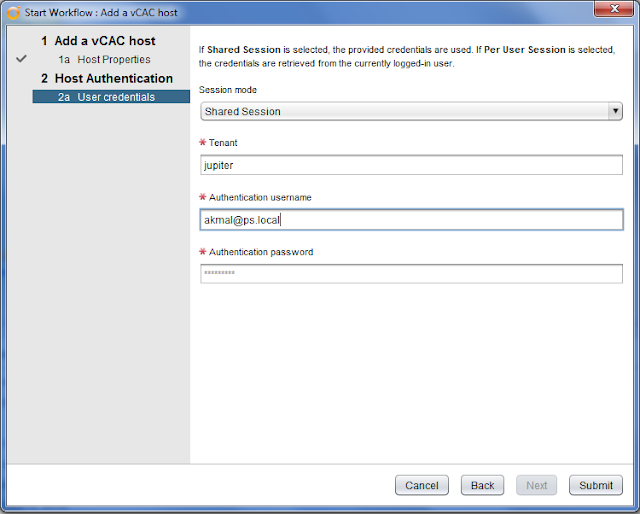

d. Wait till the Workflow finishes successfully


2. Add the iaaS host of vCAC host
a. Now run the workflow at Library>vCloud Automation Center > Add the IaaS host of a vCAC host
b. Select the vCAC host just added and click next


c. Enter the Host properties and click on next


d. Enter the credentials and click next


e. Enter the domain details and click on submit


f. Wait till the workflow completes successfully


Make sure you click on Inventory tab on top and see 2 entries named vCloud Automation Center and vCAC infrastructure Administration.


Associate a vRO workflow with a specific lifecycle state change for a machine blueprint
Make sure you have at least one blueprint in vRA and completed the above task. You can call a customization workflow during the state change of a Virtual Machine being provisioned from vRA. VM goes through 6 state changes in its life cycle.
1. Run the workflow at Library>vCloud Automation Center > Infrastructure Administration > Assign a state change workflow to a blueprint and its virtual machine
2. I will select the "BuildingMachine" stub for this example, (calling the WF before the VM starts cloning) and select the vCAC host and click on next


3. Browse and select single or multiple Blueprints and leave default and click on next


4. Select the WF you wish to run during this state change, for this, I have created a simple WF (which just logs a line for this example), and click on Submit


5. Now login to vRA and go to Infrastructure>Blueprints>Blueprints and click on the Blueprint which you selected in the above step and click on the Properties tab


you should see a new custom property named "ExternalWFStubs.BuildingMachine" and the value should be the workflow ID
Similarly, you can add any workflow during the state changes of vRA VM lifecycle
Associate a vRO endpoint with a machine blueprint
when you have multiple vROs or multiple tenants which has their own vRO clusters which is in most of the distributed environments, you can associate a vRO endpoint with a machine blueprint. vRA has a Custom Properties Reference guide for all the advanced custom properties and there is a property called "VMware.VCenterOrchestrator.EndpointName"
1. Login to vRA and go to Infrastructure>Blueprints>Blueprints and click on the Blueprint in question and click on the properties tab
2. Click on the green plus for New Property of custom properties and enter the property name "VMware.VCenterOrchestrator.EndpointName" and under value enter the name of the vRO which is added as Endpoint and click on the green check to save. And then click on OK to update the Blueprint.


This will make sure all the VMs deployed from this Blueprint will always go to the associated vRO.


