Showing posts with label application_services. Show all posts

Sunday, November 13, 2016

VCAP6-CMA (Beta) Objective 7.1 – Deploy and Manage a vRealize Application Services Appliance - Part01

In this objective, I will cover the first 3 sub-objectives

· Assign a user the necessary permissions to gain access to Application Services
· Install and set up the Application Services virtual appliance
· Configure Application Services to use a proxy

· Assign a user the necessary permissions to gain access to Application Services 

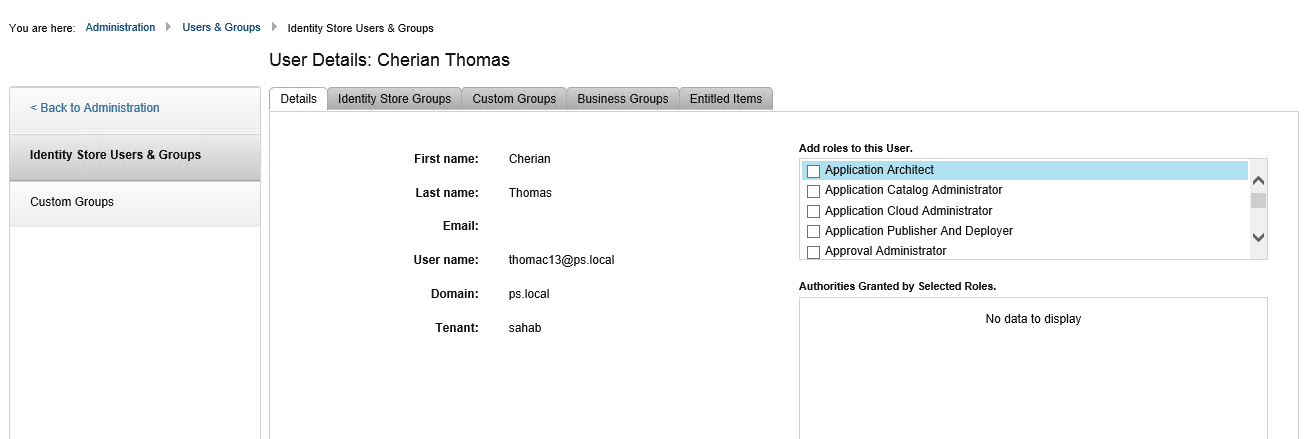
1. Login to vRA and go to Administration > Users & Groups > Identity Store Users & Group and on top right Search bar, enter the account name to which you wish to provide necessary permissions
2. Click on the name and you are presented with "Add roles to this user" option on the right side
a. Application Architect
b. Application Catalog Administrator
c. Application Cloud Administrator
d. Application publisher and Deployer

I would add all 4 roles to one master user if there it is the main user. After selecting the roles click on Update to save.

Install and set up the Application Services virtual appliance 

I have already posted about this and you could find it here. Deploying the Application Services Appliance is straight forward as any other vSphere Appliance. Before you deploy the Application Services appliance, make sure you have created the IP Pool at the Datacenter level and associated the right Network Pool. 


Configure Application Services to use a proxy


Even if you use Application Services only to deploy applications in a private cloud, some deployments might require access to URLs from outside the corporate firewall. For example, an action script might involve downloading application bits from an open-source Web site. You can configure Application Services to use a proxy for these cases.

Note: In my lab, I am not using proxy, but are the steps needed to configure proxy settings

1. Login to vRealize Application Service appliance as a darwin_user and switch user to root
2. Open the below configuration file and update the proxy IP and port information and save the file
/home/darwin/tcserver/darwin/webapps/darwin/conf/darwin_global.conf
Note the warning in the screenshot.
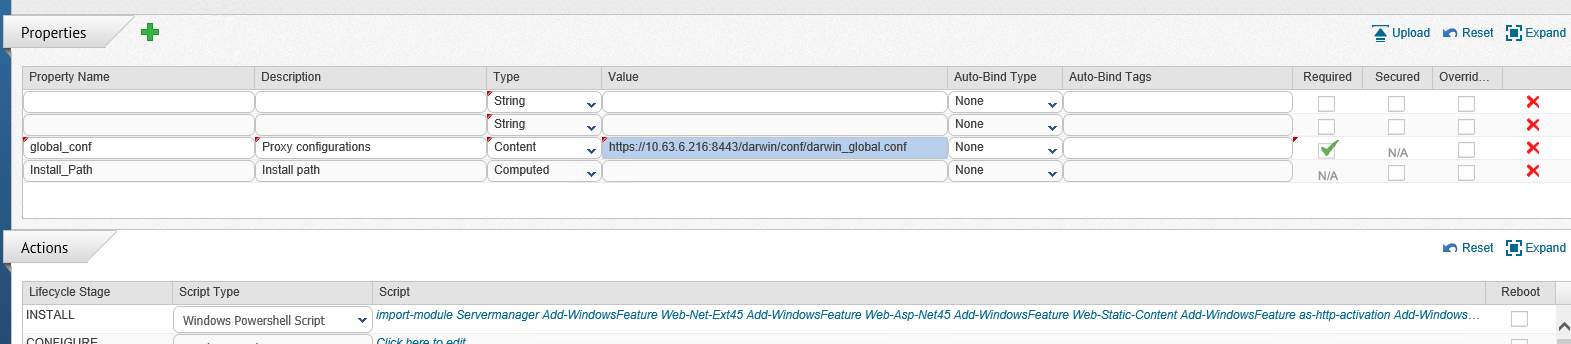
3. Update the Services to use proxy, add a property with the name 'global_conf' of type 'Content' and define the value as https://DarwinServerIP:8443/darwin/conf/darwin_global.conf

a. Login to Application Services, from the drop-down select Services and open the Service which you need to add proxy configuration
b. Click on Edit and add the property as per the screenshot
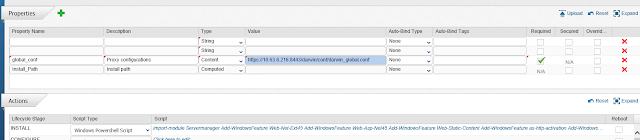
c. Update the Services to use proxy, add a property with the name 'global_conf' of type 'Content' and define the value as Add the following lines to the beginning of each action script for the service that requires a proxy:

# Import global conf
 . $global_conf

d Save the service.


Tuesday, November 8, 2016

VCAP6-CMA (Beta) Objective 7.2 - Part-03 - Application Versioning & Deleting Application Version

I have covered the major part of the objective 7.2 in part 1 and 2. In the 3rd Part, I will cover all the left out sub-objectives, which are simple and straight forward.

 Create an Application according to a deployment plan (covered in Part 1)
· Add Application Versioning
· Model and Configure an Application Blueprint (covered in Part 1)
· Delete an Application Version 
· Configure an Application blueprint according to a deployment plan (covered in Part 1)
· Create an Advanced Blueprint with Application Services (covered in Part 1)
· Create an Artifact Repository specification
· Create/Map an Artifact specification
· Deploy an Application with Artifacts
· Publish and Entitle an Application to the vRealize Automation Service Catalog (covered in Part 2)

Add Application Versioning

1. login to Application Services and click on the desired Application
2. A Single Application can have multiple version, you can find the Application Versions at the bottom
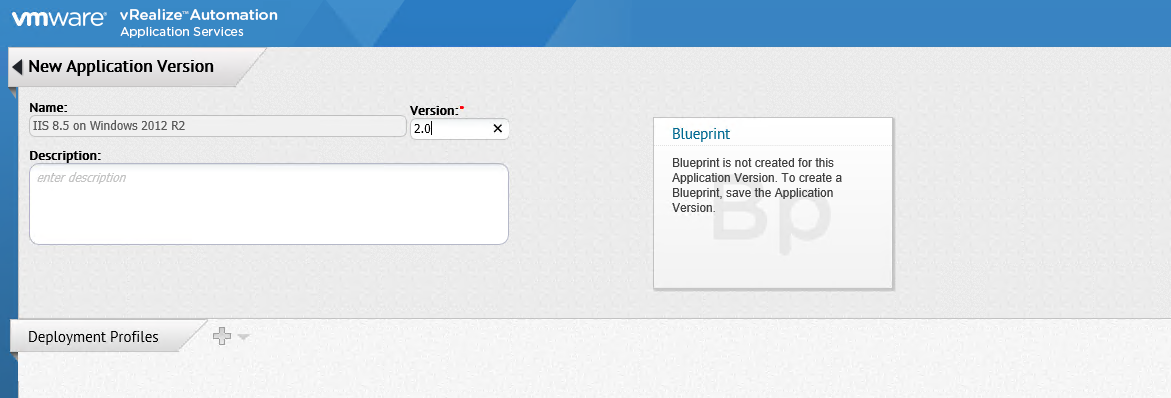
3. Click on the Green plus next to Application Versions, increase the version number and click on Save
4. Now click on Create Blueprint and  prepare your Application, Here I will create 2 Nodes and install .NET and then IIS 8.5. I have defined the sequence by arrows as which application will be installed first on each machine and also I have added the application deployment sequence for applications between VMs. This could be used for multi-tier Applications. 
5. Click On Save and Deploy if you wish to publish to vRA or deploy directly from Application Services.
6. Now under the Application, you see 2 versions. 
7. If you need to modify the existing Application version and make additional changes for other Use Cases than just click on Copy button on version box before the red cross. And increase the version number and click on Save.
8. Now if you click on the block, it will take the state of that Application and you can make the desired changes
9. Click on Save and now you have the 3rd version of Application.

Delete an Application Version 

1. Login to Application Services and when you hover the mouse on the cross of Application box, you would get the message "This Application cannot be deleted because it contains sub-objects.
2. Click on the Application and Delete the Application version by clicking on the red cross of the version box.
3. If there is an Application already deployed from this version then it is required to delete the deployment and then delete the Application version. 

Deleting the Deployment doesn't delete the Application deployed but if you had prepared Teardown in the service and if you select the teardown for the deployment then it will delete the Application.

Monday, November 7, 2016

VCAP6-CMA (Beta) Objective 7.2 - Create and Publish an Application Blueprint Part-02

This is the continuation of objective 7.2, where we created the Application Blueprint. In this post, we will publish the Application Blueprint which we created

Before we start, we need to make sure your Application Services is ready with

1. vRA and Application Service is registered
2. Application Blueprint is ready

Procedure:

1. Login to Application Services, which takes you to the Application Blueprints page.
2. In the previous post, we had created "IIS 8.5 on Windows 2012 R2" Application, click on the Application which needs to be published
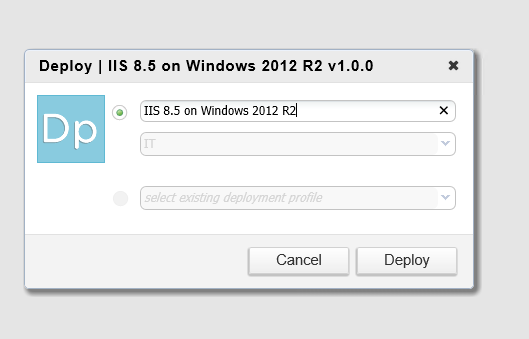
3. On the top right, click on Deploy and enter the name for Deployment and click on Deploy. The Application will be published to vRA with this name
4. Click on Map Details, this will retrieve all the relevant information about this Blueprint, like Cloud Template, Cloud Network Name. Select the correct Cloud Network or select Template Specific if you are using any custom properties in the vRA Blueprint. And then click on Next

Note: if the Cloud Template associated with Logical Template doesn't retrieve automatically then make sure you have logical template right otherwise it is related to reservation tagged in the Deployment Environment.
5. Review the Application Properties, the node information, and Service Information and click on next
6. Review the execution Plan and click on Next
7. Review all the information and click on Publish. Update the name if needed and add the description. Wait till you get "Successfully published Deployment Profile"

now login to vRA 

8. Go to Administration > Catalog Management > Catalog Items, and then click on the Application name which was just published
9. Make it part of some Services and click on Update
10. Now click on Entitlement and update the information as shown and click on Next
11. Update the Services, Catalog Items and Actions  and click on Add to complete the Publishing Application.
12. Now the Application Blueprint will show up under Catalog and is ready for the Deployment


Sunday, November 6, 2016

VCAP6-CMA (Beta) Objective 7.2 - Create and Publish an Application Blueprint Part-01

The main objective here is to create an Application which will be deployed on top of supported operating system. Below are list of all the sub-objectives

· Create an Application according to a deployment plan
· Add Application Versioning
· Model and Configure an Application Blueprint
· Delete an Application Version
· Configure an Application blueprint according to a deployment plan
· Create an Advanced Blueprint with Application Services
· Create an Artifact Repository specification
· Create/Map an Artifact specification
· Deploy an Application with Artifacts
· Publish and Entitle an Application to the vRealize Automation Service Catalog

I would cover the first objective here and rest of the objectives in coming posts but "Create an Application according to a deployment plan" is the main one under the section 7.1

Before we start, we need to make sure your Application Services is ready with

1. Cloud Providers
2. Deployment Environment
3. Logical Template
4. Respective Services for Application

1, 2 and 3 are covered here and 4th one on this post

Create a Service


I would be creating a Service for Microsoft IIS 8.5 which will be configured on Server 2012 R2. 

1. From the drop-down menu, select Services and click on the green plus to create a new Service.
2. Enter the descriptive name and select the appropriate Business Group
3. Click on Green plus for Service Version and this opens up the form which has lots of information

a. Tag = Nature of Service, in my case Web Services. These will be sorted in Canvas while creating the Application.

b. Supported Components = Depends on OS, Application and nature of script. In my case it would be just PowerShell script, so I would just select Script. similarly EXE, MSI if i have to run a setup file.

c. Supported OSes = Supported OS for application, in my case Windows Server 2012, add all the Supported OSes as much you can so that this Service could be used with those many OSes

d. Properties = The variables which you define in the script. In my case there is only one Install_Path as I am installing only Server feature. You could use Username, password or any variable which you want to pass as an input during the request. Depending on the type of Property, you can decide Required, Secured and Override. This would be Application Services's form which will replace the regular vRA request form once it is published.

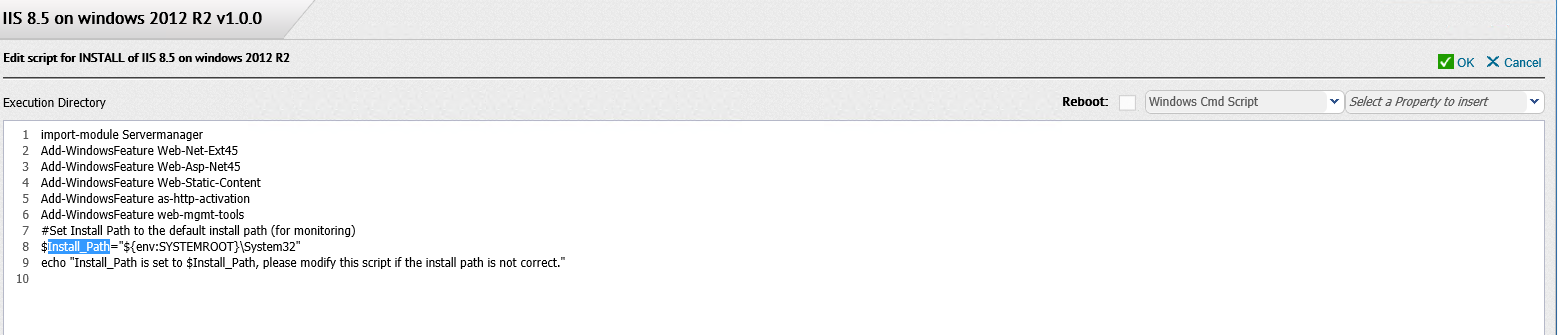
e. Actions = Here you define the Lifecycle stages of the Application. i,e., Install, Configure, Start, Update, Rollback and Teardown. Currently it supports Windows cmd, Windows PowerShell and BeanShell script. In my case I would just use Install stage and copy my PowerShell script. Script Type is set to Windows PowerShell script.

Notice the Properties defined in the script Install_Path

Create an Application Blueprint

Now comes the cool part of this tool, building your application

1. From the drop-down menu select the Applications and click the Green plus to create a new application. Give a Name, select the Business Group and click on Save
2. Click on Create Application Version and its comes with 1.0.0 version. Add the description and click on save
3 Now click on Create Blueprint which brings up the canvas
4. Drag and drop the VM template which is sorted as per the Tag you added in the earlier stage (create a service stage). You can modify the CPU, Memory and add description for the VM
5. On bottom right side you would have the list of all Services, we "created IIS 8.5 on windows". Drag and drop it on the VM box

6. Review the Properties and click on Save. Now your new application will appear along with other applications.

This completes the Application Blueprint creation. In the next blog I will show how to Publish and Deploy this Application. There is lot you can do with the Services, External Services and Canvas, also integration with Puppet, manifests and much more, I will see if I get a chance to share some posts on advanced configurations. For now we are ready to deploy our first application.


Friday, November 4, 2016

Multi-Tenancy in vRealize Application Services 6.2

There could be scenarios where you are managing two different geographically located Datacenters from single vRealize Automation by creating multiple Tenants or for different departments in the organization. After the vRealize Application Services is integrated with vRealize Automation, you can just use the regular url replacing the Tenant name.

 I believe from 6.1 version, Application Services support multi-tenancy. Below procedure is to show how to connect to newly created tenant in vRA in Application Services and upload the Out of Box Sample Data.

Pre-Requisites:


  1. vRealilze Automation 6.2
  1. vRealize Application Services 6.2  (have not tested with earlier versions)
  1. User with Application Architect privileges on vRA
  1. Application Service Admin credentials (This is the same password as root unless you have not changed)

Procedure:


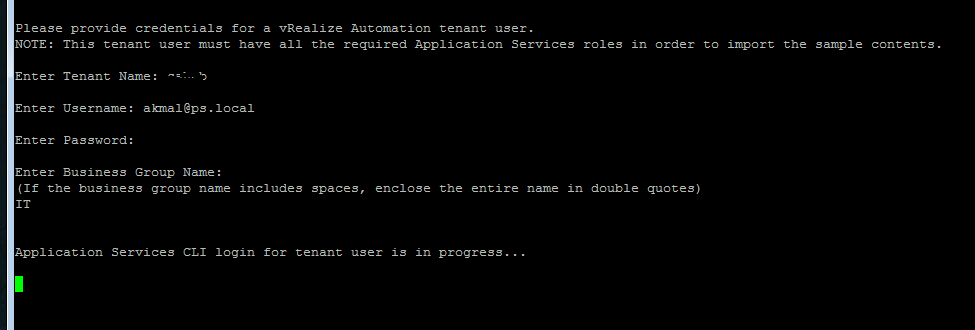
  1. Take a putty session to your vRealize Application Services and login as darwin_user and do a su - and enter the root password or connect to VM console and login with root.
  1. Cd to /home/darwin/tools
  2. 3. Run the below .sh file import_oob_content.sh and enter the prompted imformation

./import_oob_content.sh
4. Enter the password for Admin and hit enter
5. Now you would see the message about Out-Of-Box sample content and prompts you to press enter to continue
6. Enter the below prompted details
Tenant Name
User Name (Application Architect)
Business Group Name (use double quote if the is space in the name)
7. Wait till you get Out-Of-Box sample content import was SUCCESSFUL.

Connect to the Application Services for the new Tenant 
https://Application_Services_IP_or_FQDN:8443/darwin/org/Tenant_Name

Before Importing Out-Of-Box sample content

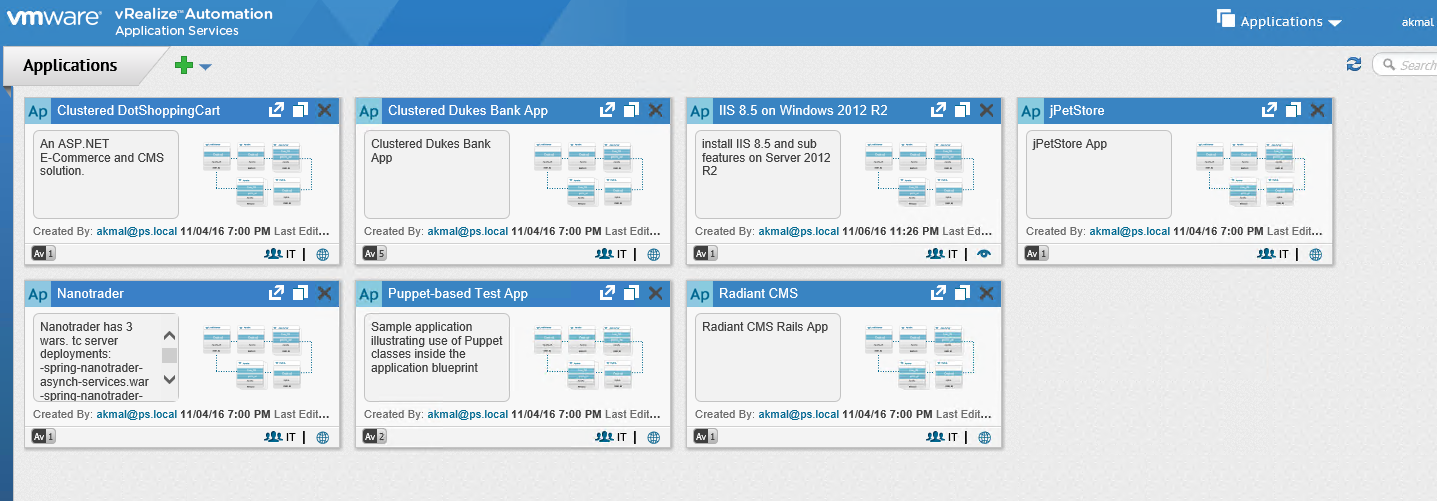
After Importing Out-Of-Box sample content